Creamy Cheese Ball – The Ultimate Make-Ahead Party Appetizer
A Creamy Cheese Ball is one of those timeless appetizers that never goes out of style. It’s smooth, flavorful, and irresistibly spreadable — perfect for pairing with crackers, pretzels, or fresh vegetables. Whether you’re hosting a holiday gathering, game night, or casual get-together, this easy cheese ball is always a crowd favorite.
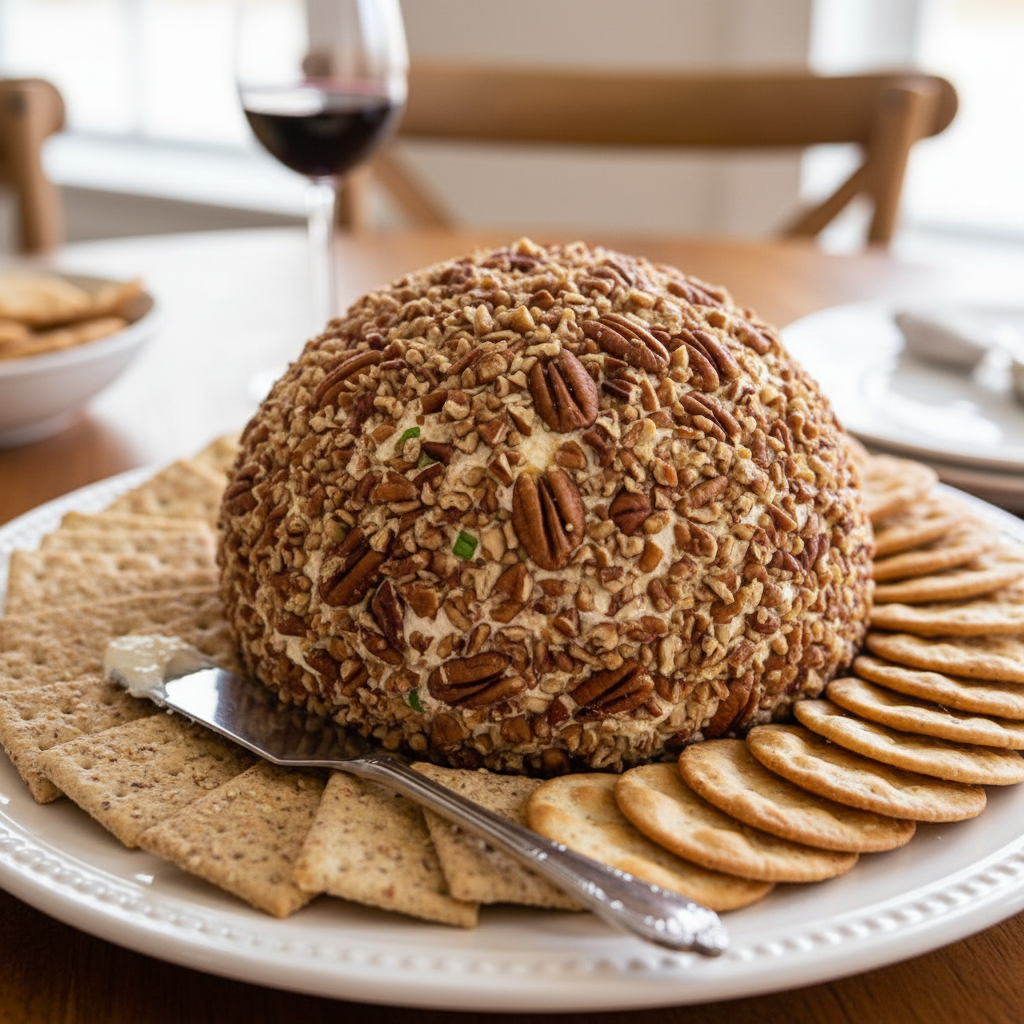
This recipe combines cream cheese, shredded cheese, and savory seasonings to create a rich and creamy texture with a perfect balance of tang and sharpness. Rolled in chopped nuts or herbs for that classic finish, it’s simple to prepare and even better when made ahead — giving the flavors time to blend beautifully.
No cooking required, no complicated steps — just a few ingredients and a quick mix, and you’ve got a delicious, creamy cheese ball ready to impress.

Why You’ll Love This Creamy Cheese Ball
1. Easy and quick to make
Takes just 10 minutes to prepare — the rest is chilling time.
2. Perfect for entertaining
Looks impressive on any snack table but is surprisingly simple to make.
3. Make-ahead friendly
Actually tastes better after chilling overnight as the flavors meld together.
4. Customizable
You can adjust the mix-ins, coatings, and flavors to suit any occasion.
5. Crowd-pleasing
Creamy, cheesy, and perfectly seasoned — everyone goes back for seconds.
6. No gluten, no fuss
Naturally gluten-free and requires no special tools or equipment.
What You’ll Need
For the Cheese Ball:
- 16 oz (2 blocks) cream cheese, softened
- 2 cups shredded cheddar cheese (sharp or medium)
- 1/4 cup sour cream or mayonnaise
- 1 teaspoon garlic powder
- 1 teaspoon onion powder
- 1 teaspoon Worcestershire sauce
- 1/2 teaspoon salt (adjust to taste)
- 1/4 teaspoon black pepper
- 1/4 cup chopped green onions or chives
- 1/4 cup finely chopped red bell pepper (optional for color)
For the Coating:
- 1 cup chopped pecans, walnuts, or almonds
(or use chopped herbs, bacon bits, or shredded cheese for variation)
For Serving:
- Crackers
- Pretzels
- Fresh vegetable sticks (carrots, celery, cucumber, bell peppers)
Step-by-Step Instructions
Step 1: Soften the Cream Cheese
Take the cream cheese out of the refrigerator and let it soften at room temperature for about 30 minutes. This makes it easier to mix and ensures a smooth, creamy texture.
If you’re in a hurry, microwave the cream cheese (unwrapped) for about 10–15 seconds — just until slightly soft but not melted.
Step 2: Mix the Ingredients
In a large mixing bowl, combine softened cream cheese, shredded cheddar cheese, sour cream (or mayo), garlic powder, onion powder, Worcestershire sauce, salt, and pepper.
Using a hand mixer or spatula, mix until everything is fully blended and smooth.
Stir in the chopped green onions and red bell pepper (if using). The mixture should be thick, creamy, and evenly mixed.
Tip: For an extra punch of flavor, add a pinch of cayenne pepper or a dash of hot sauce.
Step 3: Shape the Cheese Ball
Spoon the cheese mixture onto a large piece of plastic wrap. Gather the wrap around the mixture and form it into a ball shape with your hands.
Twist the ends of the plastic wrap to seal it tightly and refrigerate for at least 2 hours, or overnight if possible. This helps it firm up and allows the flavors to blend together.
Step 4: Prepare the Coating
Before serving, spread your chosen coating (chopped nuts, herbs, or bacon) evenly on a large plate or shallow dish.
Unwrap the chilled cheese ball and roll it gently in the coating until evenly covered on all sides. Press lightly so the coating sticks well.
Variation Ideas for the Coating:
- Classic: Chopped pecans or walnuts
- Herb: Chopped parsley, dill, or chives
- Smoky: Crumbled bacon and shredded cheese
- Festive: Diced dried cranberries and pecans
Step 5: Serve and Enjoy
Place the finished cheese ball on a serving platter. Add crackers, pretzels, and veggies around it for a beautiful presentation.
Allow it to sit at room temperature for about 15 minutes before serving — this makes it softer and easier to spread.
Tips for the Perfect Cheese Ball
- Use full-fat cream cheese.
It creates a richer flavor and firmer texture. - Let it chill.
Chilling is essential — it firms up the cheese and enhances flavor. - Mix evenly.
Make sure your seasonings and add-ins are well distributed throughout the mixture. - Add crunch or sweetness.
Balance the creamy texture by rolling in crunchy nuts or slightly sweet dried fruit. - Keep it cold for serving.
If serving outdoors or for long periods, place the platter over a bed of ice or chill intermittently. - Make multiple mini cheese balls.
Perfect for parties — easier to serve and great for different flavors or coatings.
Flavor Variations
Once you have the creamy base, you can easily change the flavor profile to suit any occasion. Here are a few favorites:
Savory Variations
Bacon Ranch Cheese Ball:
Mix in 1 tablespoon ranch seasoning and 1/4 cup cooked, crumbled bacon. Roll in more bacon and chives.
Jalapeño Cheddar Cheese Ball:
Add 1 finely chopped jalapeño (seeds removed) and a pinch of cayenne for mild heat.
Garlic Herb Cheese Ball:
Mix in 1 teaspoon garlic paste and 1 tablespoon finely chopped fresh herbs like parsley, dill, and thyme.
Dried Beef Cheese Ball:
Add 1/2 cup chopped dried beef and 1/4 cup green onions. Roll in more dried beef for a classic flavor combo.
Sweet & Savory Variations
Cranberry Pecan Cheese Ball:
Mix in 1/4 cup dried cranberries and roll in chopped pecans for a festive holiday version.
Honey Almond Cheese Ball:
Add 1 tablespoon honey and roll in slivered almonds — a slightly sweet, elegant twist.
Serving Suggestions
This creamy cheese ball pairs beautifully with a variety of snacks and sides. Try serving with:
- Crackers (gluten-free or whole wheat)
- Pretzel sticks or chips
- Fresh veggie sticks (carrots, celery, cucumber)
- Apple slices for a sweet crunch
- Toasted baguette rounds
- Pita chips or tortilla chips
It’s also great as part of a charcuterie board with meats, fruits, and nuts. The creamy texture and savory flavor balance perfectly with salty or crunchy accompaniments.
How to Store and Make Ahead
Refrigerator:
Store the cheese ball (wrapped tightly in plastic wrap or an airtight container) for up to 5 days.
If already coated in nuts, it’s best eaten within 2–3 days to keep the coating crisp.
Freezer:
You can freeze the uncoated cheese ball for up to 1 month.
Wrap it tightly in plastic wrap and aluminum foil. Thaw overnight in the fridge, then roll in your desired coating before serving.
Make-Ahead Tip:
Prepare the cheese mixture 1–2 days ahead, refrigerate, and roll in the coating right before serving for the freshest presentation.
Troubleshooting
Too soft to shape:
Refrigerate longer — at least 2 hours — to firm it up.
Too firm to spread:
Let it sit at room temperature for 10–15 minutes before serving.
Flavor too mild:
Add more Worcestershire sauce, garlic powder, or a pinch of cayenne to enhance the taste.
Coating not sticking:
Press gently while rolling or brush the surface with a little sour cream before coating.
Cheese ball cracking:
Wrap tightly in plastic wrap and smooth out with your hands while shaping.
Frequently Asked Questions
Can I use low-fat cream cheese?
You can, but it won’t be as rich or firm. Full-fat gives the best flavor and texture.
What’s the best cheese for this recipe?
Sharp cheddar adds great flavor, but you can mix in Monterey Jack, Colby, or pepper jack for variety.
Can I make this without nuts?
Absolutely. Roll in herbs, shredded cheese, or crushed pretzels instead.
Can I serve it warm?
This recipe is best served chilled or slightly softened at room temperature.
Can I turn this into a spread instead?
Yes! Skip shaping it into a ball and serve directly in a bowl as a creamy cheese spread.
Nutrition Information (Approximate per serving, based on 12 servings)
- Calories: 210
- Protein: 7g
- Fat: 18g
- Carbohydrates: 3g
- Fiber: 0g
- Sugar: 1g
(Nutrition may vary based on mix-ins and coatings.)
Why This Recipe Works
The perfect cheese ball comes down to three things: texture, flavor, and balance.
Softened cream cheese provides a creamy base, shredded cheddar adds a tangy bite, and seasonings bring depth. A touch of Worcestershire sauce enhances the umami flavor, while the coating adds crunch and visual appeal.
By chilling the mixture, you allow the ingredients to meld into a cohesive, smooth consistency that’s easy to shape and even easier to spread. Every bite is rich, flavorful, and perfectly balanced — a combination that keeps people coming back for more.
Tips for Customizing Your Cheese Ball Routine
- Make two smaller cheese balls instead of one large one — perfect for variety and portioning.
- Dress it up for holidays — roll in cranberries and parsley for festive colors.
- Serve with multiple dipping options — crackers, veggies, pretzels, and apple slices.
- Add heat — mix in jalapeños, cayenne, or hot sauce for a spicy kick.
- Turn leftovers into a dip — stir softened cheese ball into warm pasta or baked potatoes for a quick meal idea.
Final Thoughts
This Creamy Cheese Ball is a classic appetizer that’s as delicious as it is versatile. With just a few ingredients and no cooking required, it’s the kind of recipe that makes entertaining stress-free and impressive.
The creamy, flavorful base combined with your favorite mix-ins and coatings creates an irresistible party centerpiece that guests can’t resist.
Whether you’re preparing for a holiday gathering, a weekend party, or just want an easy snack to keep in the fridge, this cheese ball delivers every time — smooth, savory, and effortlessly delicious.
Homemade appetizers don’t get any easier — or creamier — than this.